Make your own ‘Flubber’– it’s like silly putty!

Flubber is a fun, putty-like substance that is different than regular play dough. It flows and moves but it is not as liquid as slime. You have to give this stuff a try. It is super easy to make and my kids LOVE to play with it. BONUS–there is a lot of science that can be discussed with this stuff!

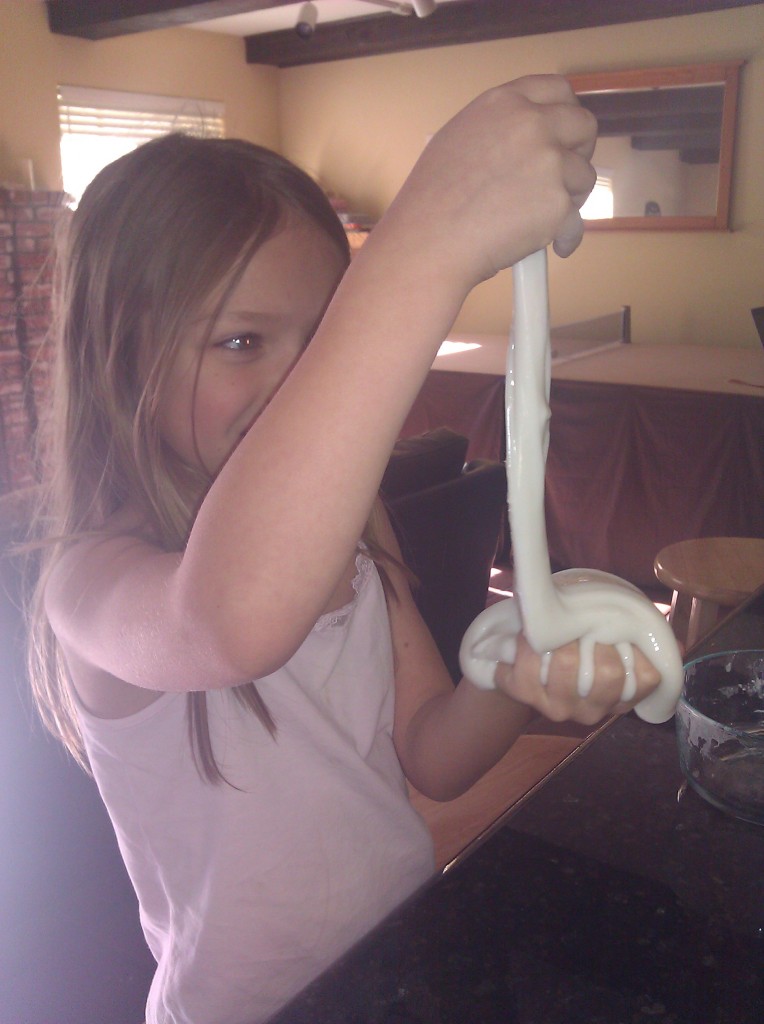
Playing with Flubber!

Playing with Flubber!

I used this recipe from Food.com

  • 1 1/2 cups warm water
  • 2 cups white glue
  • food coloring (I didn’t use this)
  • 1 1/3 cups warm water
  • 3 teaspoons borax

Directions:

  1. In one container mix 1 1/2 cups warm water, white glue and a few drops of food coloring.
  2. In a second container mix 1 1/3 cups of warm water and Borax.
  3. Mix the Borax mixture into the glue mixture until combined. (may be some liquid in bottom of container).
  4. Place Flubber on a tray and let stand for a few minutes before playing with it!
  5. Store in air tight container.

Read more at: http://www.food.com/recipe/flubber-134095?oc=linkback

You can use the extra borax in your laundry. Works wonderfully on whites! (I tested this out because we bought the extra big box of borax for our Flubber too!)

Science of Flubber: It’s not just for little kids!

Definition:
Flubber is a polymer. Polymers are very long chains of repeating molecules. A chemical reaction between the polymer from the white glue (polyvinyl acetate) and the borax (borate ions) causes the molecules to link together in a 3-dimensional configuration creating FLUBBER!

Properties
“Flubber is a non-Newtonian fluid that flows under low stress, but breaks under higher stresses and pressures. This combination of fluid-like and solid-like properties makes it a Maxwell solid.” (Quoted from “Wikipedia”)”

Well that’s all well and good but does it help us learn anything?
I recently used Flubber at a book club meeting to visualize glacial flow. Flubber acts a lot like glacial ice. When it is cold it flows slowly. When it is warm it flows quickly. When you pull at it quickly it shears–just like when glaciers fall off a cliff into the ocean. (See the first source below for more information on demonstrating glacial flow with Flubber.)

Another use for flubber in teaching is to demonstrate a chemical reaction. By combining two different elements you can create a completely different substance.

Here are a few everyday objects that are made with polymers:

  • anything plastic
  • proteins, such as hair, nails, tortoise shell
  • cellulose in paper and trees
  • DNA
  • silly putty
  • rubber
Flubber is fun for adults and kids!

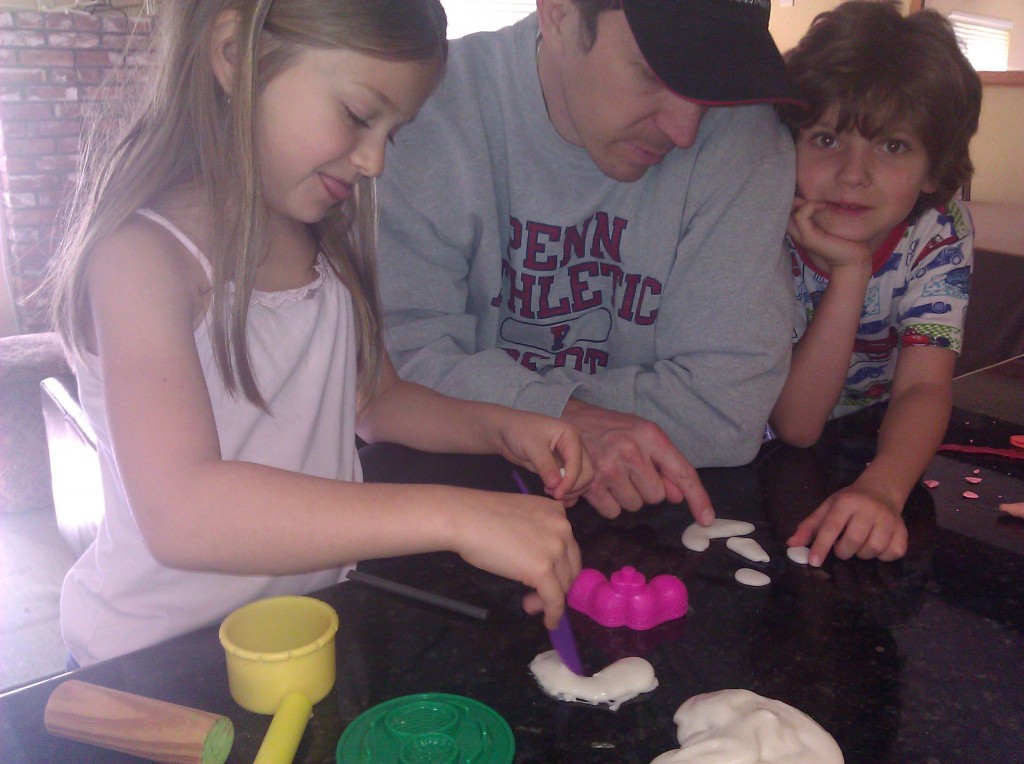
Flubber is fun for adults and kids!

I hope that you will find time to make and play with Flubber with your kids. My husband has been playing with flubber with my daughter the entire time I have been writing this article. PROOF that it is as fun for adults and children to play with! Enjoy!


You can buy the Magic School Bus Polymer Lab from Amazon and help support Hands On Learning 4 All.com


Sources:

Spring Break Activity: Tessellations

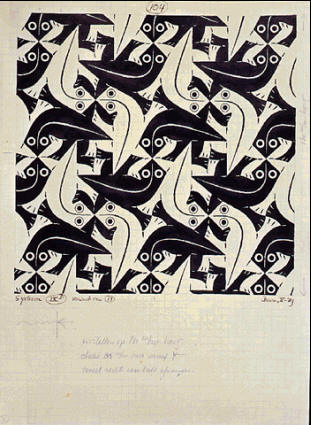
A tessellation is a shape that is repeated over and over again covering an area without any gaps or overlaps. One of the most famous artists who created tessellations is M.C. Escher. You can see one of his tessellation pieces below.

Taken from http://www.mcescher.com/

M.C. Escher --Tessellation

M.C. Escher –Tessellation

Below is a sement from Cyberchase –a television show on PBS:

Start at 3:31 for the segment on Tessellations:

    For the full video: http://pbskids.org/go/video/?pid=auo60NBX2y1WrxRd9zb9Y2kwnRBhRhV7&category=Cyberchase

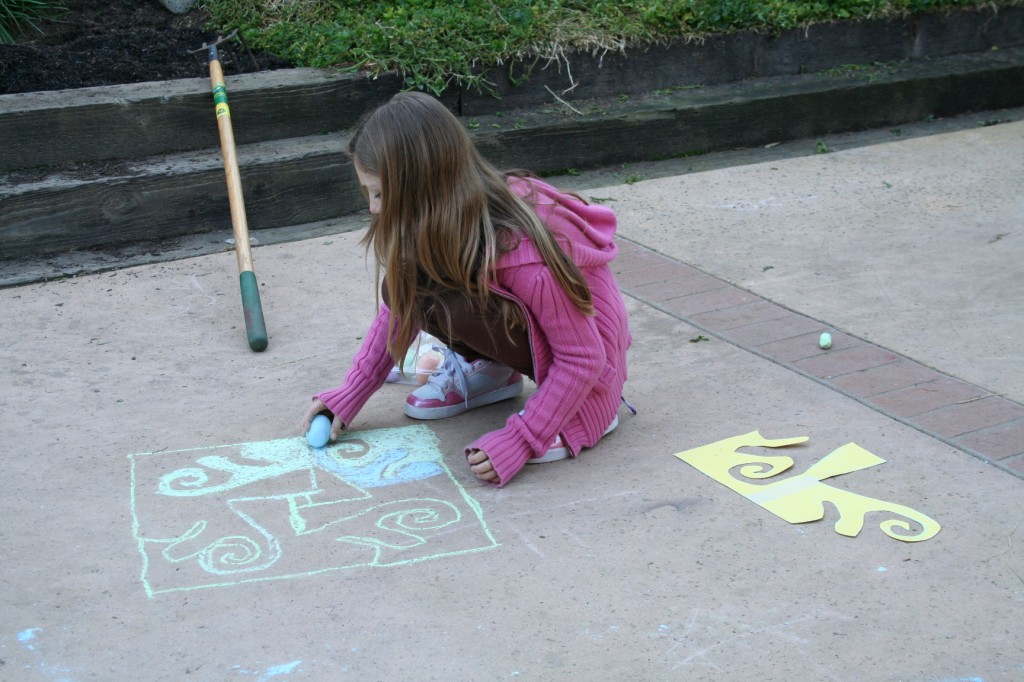
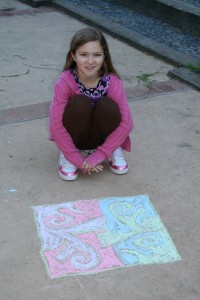
    The video segment explains how to make the template. My children usually take their templates outside to the driveway and then make their tessellations with sidewalk chalk. I hope that your children will enjoy making tessellations too!

    Making a Tessellation with Chalk

    Making a Tessellation with Chalk

    Finished - repeated 4 times!

    Finished – repeated 4 times!

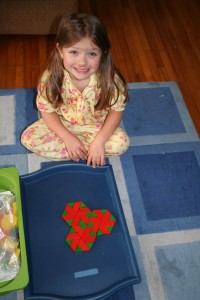
    My 4 yr old completed a Tessellation with Pattern Blocks!

    My 4 yr old completed a Tessellation with Pattern Blocks!

Spring Break Activity: Easy, No Mess Paper Mache

My children have always been fascinated with making toys. They have tried making things out of cardboard, yarn, wire, wood. Some of the best items they have produced are made by using a simple ‘fake’ paper mache’ technique.

Here’s How it is Done:

  1. First crumble some paper up into the shape you desire. Use a little masking tape to hold it in place. (We like to use newspaper.)
  2. Cover the entire piece with masking tape. Smooth the masking tape out as much as possible. The piece must be covered in tape with no newspaper showing.
  3. Paint your sculpture with tempera paints and decorate it with other craft accessories like rocks, feathers, eyes, ribbons, etc.

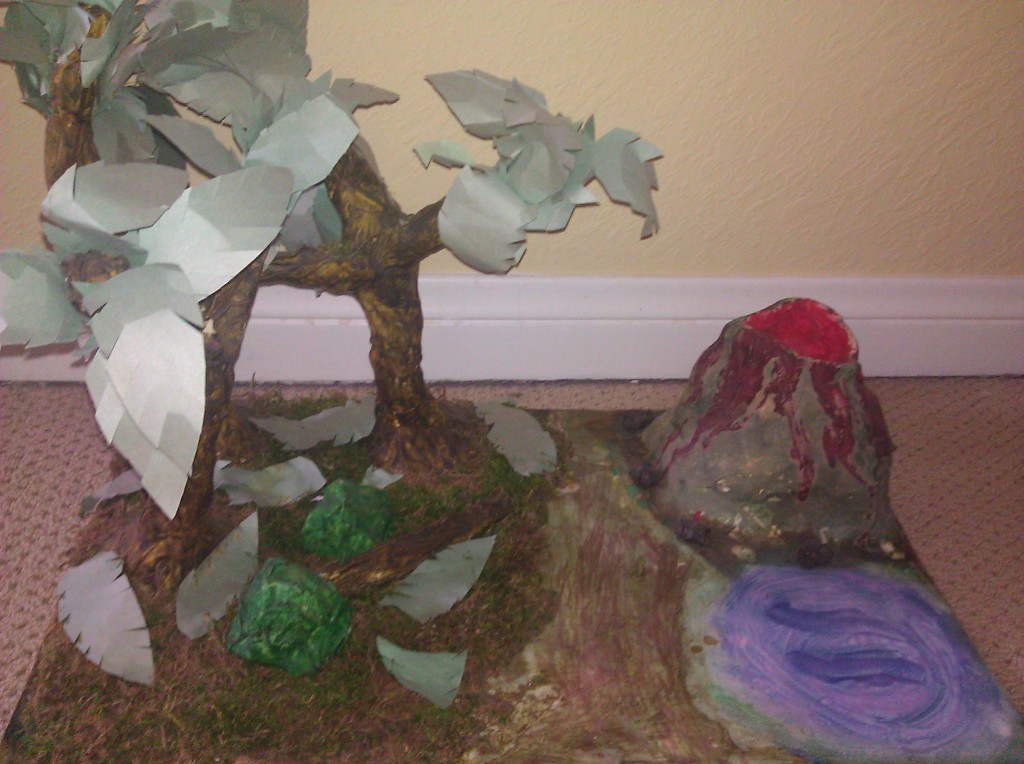
    Here’s a sample of an environment my daughter made for dinosaurs!

    Easy, No Mess Paper Mache' Dinosaur Environment!

    Easy, No Mess Paper Mache’ Dinosaur Environment!

    I LOVE Fabri-tac for these types of projects

    Fabri-tac is a type of glue that works just like hot glue (instantly) without the heat! So it is GREAT for kid projects like this one where there may be heavy pieces to glue down. White glue can’t handle the weight of some things and the wait time is painful for children. Fabri-tac works almost instantly and really handles heavy, crazy shaped objects just as well as hot glue!

    Good Luck! I would love to see your Easy, No Mess Paper Mache’ projects! Email pictures of them to me here Veronica/Hands On Learning 4 All!

Another Spring Break Activity: Build a Rube Goldberg Machine

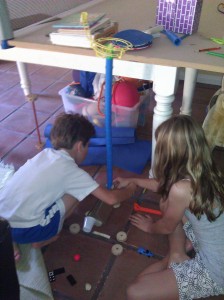
Building a Rube Goldberg Machine

Building a Rube Goldberg Machine

This is the marble run we own.

What is a Rube Goldberg Machine? Take a look at this classic video.

How to start:

Get a bunch of building materials together. Tinker toys, pool noodles, marble tracks, books, tape (masking and clear), wooden blocks, legos….you get the idea. Now watch the videos above and below and let your imagination start working. Start with a track of some kind and a ball. Most Rube Goldberg machines have a ball that runs on a track that triggers other elements to move along the path to get to the end.

Here’s another example from a commercial for Sharp’s Touch Wood Phone:

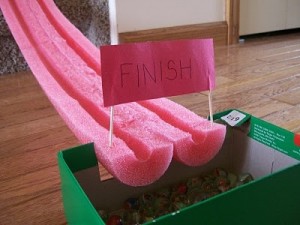
Here’s an idea for how to use a pool noodle as a track

Image courtesy of: http://pinterest.com/pin/343258802818836114/

Image courtesy of: http://pinterest.com/pin/343258802818836114/

A Little bit about Rube Goldberg

Excerpted from: http://www.rubegoldberg.com/about
“Rube Goldberg (1883-1970) was a Pulitzer Prize winning cartoonist, sculptor and author.
Reuben Lucius Goldberg (Rube Goldberg) was born in San Francisco on July 4, 1883. After graduating from the University of California Berkeley with a degree in engineering, Rube went on to work as an engineer for the City of San Francisco Water and Sewers Department.

After six months Rube shifted gears and left the Sewers Department to become an office boy in the sports department of a San Francisco newspaper. While there he began to submit drawings and cartoons to the editor until he was finally published. Rube soon moved from San Francisco to New York to work for the Evening Mail drawing daily cartoons. This led to syndication and a national presence – and the rest is history.

A founding member of the National Cartoonist Society, a political cartoonist and a Pulitzer Prize winner, Rube was a beloved national figure as well as an often-quoted radio and television personality during his sixty year professional career.

Best known for his “inventions”, Rube’s early years as an engineer informed his most acclaimed work. A Rube Goldberg contraption – an elaborate set of arms, wheels, gears, handles, cups and rods, put in motion by balls, canary cages, pails, boots, bathtubs, paddles and live animals – takes a simple task and makes it extraordinarily complicated. He had solutions for How To Get The Cotton Out Of An Aspirin Bottle, imagined a Self-Operating Napkin, and created a Simple Alarm Clock – to name just a few of his hilariously depicted drawings. ”

I hope this gives you some great ideas to make your own Rube Goldberg Machine. I would love to see your inventions. You can send your videos of your Rube Goldberg Machine to Veronica/Hands On Learning 4 All

A Spring Break Activity for Your Kids: Science that POPS!

Spring Break is a great time of the year. The kiddos are ready for a break from school and the weather often permits them to get outside and have some fun. But do your kids want to just watch the tv or play video games? This drives me crazy. My son LOVES his Wii but we have to regulate his time or he would play it forever. Sometimes (even with the hundreds of toys that we have) he says, “I’m bored.” So I have to stimulate his creative thinking with a high interest activity. The activity below worked for all of my children. They got so excited they wanted to do many tests to see which one worked the best and produced the biggest ‘pop’.

Volcanos and Chemistry:

Chemical reactions are fun. It’s like a bit of science magic. This experiment uses household items from your kitchen to create a safe non-toxic reaction.

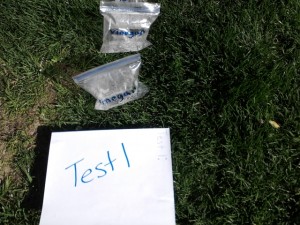
Our Test Bags: Baking Soda Tablets and Vinegar="POP!"

Our Test Bags: Baking Soda Tablets and Vinegar=”POP!”

Here’s what you will need:

  1. Baking Soda Tablets (alaseltzer or generic): Sodium Bicarbonate – 4 Tablets
  2. White Vinegar
  3. Water
  4. Ziplock Bag

Directions:

  1. Open the Sodium Bicarbonate Tablets and stack them.
  2. Open the ziplock bag and pour in about 1″ of vinegar.
  3. Carefully pinch the tablets inside the bag near the top, but do not allow them to fall into the vinegar.
  4. Zip the bag closed ( you will need a partner to help you ) but do not drop the tablets into the vinegar
  5. Drop the tablets and shake the bag 4-5 times fast. Then put the bag down and move back at least 5 feet.
  6. The bag will fill up with gas and pop when it can no longer hold the gas that the sodium bicarbonate and the vinegar create.

What Happened?

Vinegar has acetic acid and its chemical formula is CH3COOH. Sodium Bicarbonate or Baking Soda’s chemical formula is NaHCO3. The reaction between the two compounds looks like this CH3COOH + NaHCO3 -> H2O + NaOCOCH3 + CO2. Everything past the arrow is what is left after the reaction. If you wait until your bag is completely liquid and no more bubbles are produced you can sniff your results. (Pour the remaining solution into a cup and smell it.) It should smell like salty water. H2O is water. NaOCOCH3 is a salt known as sodium acetate. CO2 is carbon dioxide that is the gas you saw fill the bag and the bubbles you saw forming.

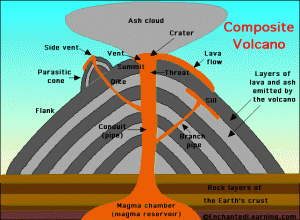
volcanodiagram

How does this relate to volcanoes?

Volcanoes are mountains or hills that are typically cone shaped that have a vent in the earth’s crust through which lava, steam, and ashes are expelled. The pressure builds up below the earth’s surface. When the pressure gets very high the hot melted rock called magma travels up through the conduit (or pipe) and breaks the surface of the volcano often filled with rock and/or water. The great explosion releases the magma which flows down the side of the volcano mountain. As the magma cools down it turns back into solid rock.

Your bag filled up with pressure from the chemical reaction of the baking soda tablet and vinegar and eventually ‘popped’ like the volcano explodes from the pressure of the hot magma. Pretty cool, huh?

Want a few books to read to go along with your Volcano activity?


Come back soon to see my next spring break activity!

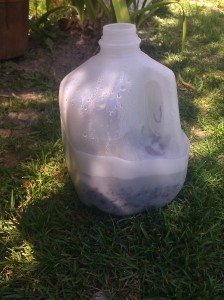
Milk Carton and Toilet Roll Tube Terrarium

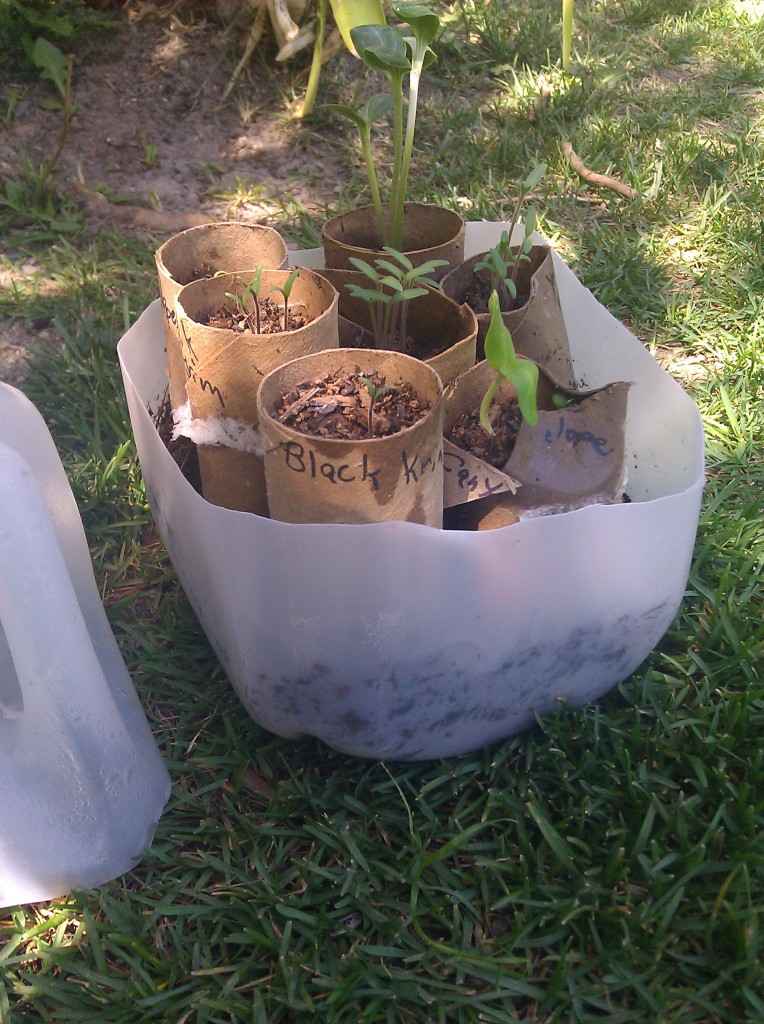
Milk Carton Terrarium

Milk Carton Terrarium


Step 1:
Cut the plastic gallon container just below the handle.
Step 2:
Fill the bottom of the container with soil about 1″ high.
Step 3:
Label the toilet roll tubes with the seeds that they will contain.
Step 4:
Push the toilet roll tubes into the soil to help them stand tall.
Step 5:
Fill the tubes with soil (don’t have to be to neat here the overflow will just fill the base of the container a bit more.)
Step 6:
Plant your seeds into their corresponding tubes.
Step 7:
Water gently. Place the top half of the carton back on top of the bottom half to create the ‘dome’ of your terrarium. Leave the lid off if the seeds remain too moist or screw it on to maintain more moisture.

Watch the seeds grow. We started ours 2 weeks ago and they are doing very well. Some are ready to be planted into larger containers. I would love to hear about how your kiddos do with their seed terrariums!

Closed Terrarium

Closed Terrarium

Homemade Bottle Stomp Rocket!!!!!!

I host a book club on a monthly basis for a group of homeschooling kids ages 4-13. We read one book each month from the Magic Tree House book series by Mary Pope Osborne. This month’s discussion will be about the Midnight on the Moon book from the series. I usually plan a discussion of the book and a craft or activity based on the book’s theme. This month our craft/activity will be launching stomp rockets.

Here is how to make the ‘launch’ pad and the rocket for the activity if you want to build one on your own.

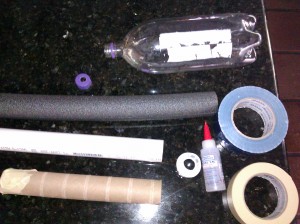
Materials Needed

You will need: 1 Standard 2 liter bottle with a hole drilled in the middle of the cap, 3' of flexible foam tubing, 1 1/2" diameter PVC tubing- 1 ft., 1" PVC straight adapter to a threaded end (the threaded end will hold the lid of your 2 ltr bottle- take one along to the store to make sure it fits tightly), Paper towel tube with one end sealed with masking tape, Duct tape, Fabric Tac glue or hot glue

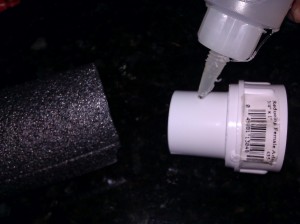
Foam to Adapter

Use the fabri tac glue to attach the smooth end of the PVC adaptor to the flexible foam tubing. Apply glue to the end of the adapter then slide it into the foam tubing.

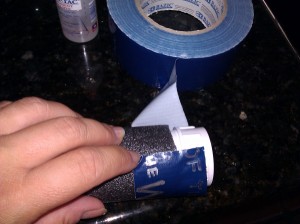
Duct tape Adapter to foam tubing

Duct tape Adapter to foam tubing.

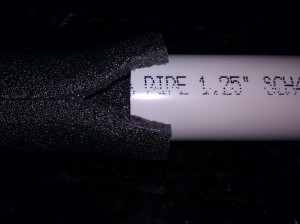
Fit PVC tube into foam tubing

Fit PVC tube into the opposite end of the foam tubing by cutting a small slit in the foam tubing.

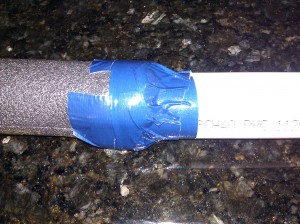
Duct tape foam to PVC

Duct tape foam to PVC and thoroughly cover the slit making a tight fit with no air leaks.

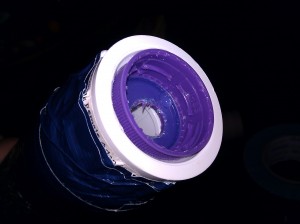
Glue bottle cap in threaded end of adapter

Glue bottle cap in threaded end of adapter. I used the 2 liter bottle as leverage to screw the cap into the adapter. I placed the fabri tac glue inside the adapter on/into the threads. Then I removed the bottle to make sure that the bottle didn't get glued to the lid just in case the glue leaked inside.

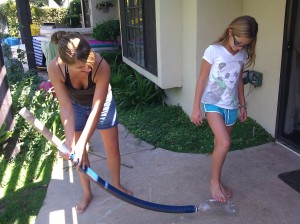
Slide the paper tube rocket over the PVC tube and stomp to launch

Once all of your glue has dried screw on the empty 2 liter bottle. To make the rocket: Tape one end of your paper towel tube with masking tape and decorate it as you like. Slide the open end of the paper tube rocket over the PVC tube and stomp to launch!

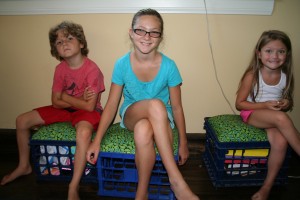
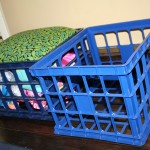
Milk Crate Seats (and Storage)

Milk Crate Seats

DIY Milk Crate Seats

Here is a tutorial on how to build your own milk crate seats. I have seen these done all over Pinterest but no one has a good tutorial on how to actually get it done. So I thought I would show you how I made mine. It is really very easy and if you use your buyers knowledge and find inexpensive materials each one will cost you under $10. I had the crates, particle board, and the quilt foam sheeting so three crates only cost me $15. (My fabric was $7 per yard.)

Materials:
1/2″ MDF or Particle board cut to the size of the inside ‘lip’ of your milk crate.
Staple gun and staples
Foam sheet for quilting
Pillow stuffing foam
Fabric (if you are only doing one crate 1 yrd will be plenty. I did 3 crates and used 2 yrds of fabric.)

Directions:
1. Measure the inside ‘lip’ of the crate. This is where your cushion will rest and create a seat—AND storage later. Either cut your MDF or particle board or have it cut for you in the dimensions you measured. A little smaller is better than a little bigger because you will be adding a little thickness with the foam and fabric later
2. Cut your quilt sheeting just a little bigger than your board.(Remove board for next step.)
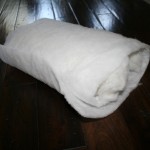
3. Rest your pillow stuffing on top of the quilt sheeting and wrap the pillow stuffing in the quilt sheeting. We will call this the ‘pillow top’.
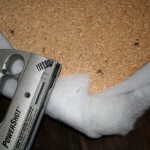
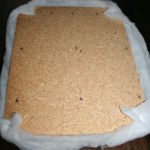
4. Begin stapling the corners of the pillow top to the board.
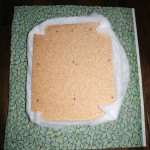
5. Cut fabric a bit bigger than the board with pillow top. (You will want enough extra fabric to fold over the raw edges before you staple the fabric to the board.)
6. Fold over fabric raw edge and begin stapling in the center of one of the sides.
7. Work around all of the sides in the same fashion.
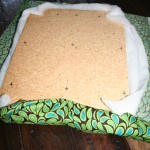
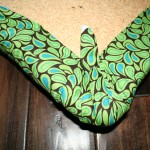
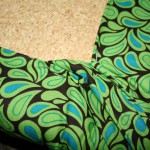
8. Pinch together corners of the fabric and staple the corner. Then tuck the extra fabric from the ‘pinched fabric’ into the folded side and staple again. (See photos) Work around until all corners are stapled. Staple around the fabric edges until none of the fabric is loose.
9. That’s it! Just fit your finished top back onto the crate and you have a crafty seat that is also storage. I am using this in my homeschool classroom but I can see these in a kid’s room for a reading area too.

Photos:

Measure inside lip

1. Measure inside lip

2. Cut Quilt sheeting

2. Cut Quilt sheeting

3. Center Pillow Stuffing.

3. Center Pillow Stuffing.

3. Wrap Quilt Sheeting.

3. Wrap Quilt Sheeting.


4. Wrap and staple corners.

4. Wrap and staple corners.

4. Staple corners.

4. Staple corners.

5. Cut fabric larger.

5. Cut fabric larger.

6. Staple fabric in the center of each side.

6. Staple fabric in the center of each side.

8. Pinch together corners and staple.

8. Pinch together corners and staple.

8. Tuck extra fabric and staple.

8. Tuck extra fabric and staple.

Morning Math Routine

Click to download PDF


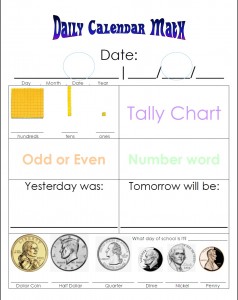
As I am working on getting together materials for our upcoming school year I started ‘thumbing’ through Pinterest for some ideas. If you haven’t visited this site yet you MUST. I have gotten tons of great ideas for decorating my home, meals to make, crafts to try and –of course– homeschooling ideas.

I have always done a morning routine with my kids that involved base ten blocks, money, and a hundred chart that went with the calendar date. But each little segment seemed so disjointed. I wanted a way to display all of the results. I found tons of great ideas on Pinterest but none of them quite matched my needs. So I created my own chart using just the elements that were relevant to my morning routine.

By using this chart with my hands on manipulatives (real money, base ten blocks, tally sticks) I will create a visual tie-in to our morning math routine and hopefully make the language/math connection stronger. I love morning math because it only takes about ten minutes to complete but covers so many basic math concepts. Hope you enjoy your free download!

DIY 3 person desk and Bulletin Board

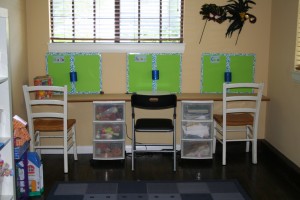
DIY 3 person desk from plastic storage containers and shelf

I have been spending the last week organizing our materials for homeschool in the fall. I decided to create a new workspace for my children because our old ‘art table’ was getting a bit too small for my 10yr old. (It was designed for a toddler!) I had 2 plastic 3 drawer bins that are on rollers. All I needed to buy was an 8ft long board at Lowes. This board was prefabricated out of particle board and already had a rounded plastic edge adhered to it. It was meant to use as shelving but when placed on top of my two storage bins it makes a perfect work space for 3 children.

The best thing about the desk is that it cost me a total of $12 to make. Another perk to this desk is it rolls. So I can easily move it from one wall to the other if I choose to redecorate. Or if guests come into town I can easily disassemble the whole thing and put a bed in it’s place.

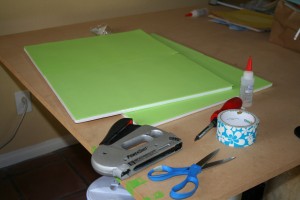
DIY Bulletin Board: Materials Needed

DIY Bulletin Board: Materials Needed

You may notice the bulletin boards that hang on the wall in front of each child’s work space. I went to a craft store and priced bulletin boards that were 1/3 the size of these. The price was a whopping $14 each. So I decided to make these and save myself some cash. For a total of $9 each I made these bulletin boards that are 3 times bigger and in custom colors! That’s a savings of $15! Here’s how I did it.

You will need foam craft board, (I doubled mine up so I can use thumbtacks in them.) Dense foam sheets, (I needed 2 to cover my board.) Colored duct tape, Fabri-tac glue, a staple gun and scissors.

My boards came in a two pack covered in plastic sheeting to hold them together. I left the plastic sheeting on and glued my colored foam directly to the boards.

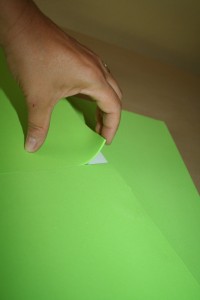
Glue foam sheet directly to craft foam boards

Glue foam sheet directly to craft foam boards

Cover the edges of the board with your colored duct tape. I put a strip of the colored duct tape down the center of the board to conceal the seam between the two foam sheets. I like the idea of two sections of the board so the kids have one half for school and the other half for home.

I glued the foam can holder onto the board on the duct tape in the center and then used the staple gun to really secure the cup holder to the board because I know this section will really get used taking pencils/pens in and out of it.

That’s it….now each child has his/her own work space and I did the whole area for under $30! Yay!