DIY 3 person desk from plastic storage containers and shelf
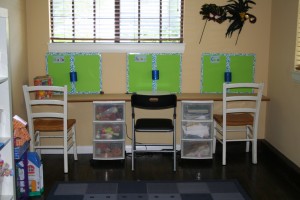
I have been spending the last week organizing our materials for homeschool in the fall. I decided to create a new workspace for my children because our old ‘art table’ was getting a bit too small for my 10yr old. (It was designed for a toddler!) I had 2 plastic 3 drawer bins that are on rollers. All I needed to buy was an 8ft long board at Lowes. This board was prefabricated out of particle board and already had a rounded plastic edge adhered to it. It was meant to use as shelving but when placed on top of my two storage bins it makes a perfect work space for 3 children.
The best thing about the desk is that it cost me a total of $12 to make. Another perk to this desk is it rolls. So I can easily move it from one wall to the other if I choose to redecorate. Or if guests come into town I can easily disassemble the whole thing and put a bed in it’s place.
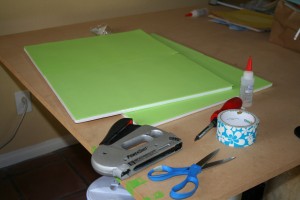
DIY Bulletin Board: Materials Needed
You may notice the bulletin boards that hang on the wall in front of each child’s work space. I went to a craft store and priced bulletin boards that were 1/3 the size of these. The price was a whopping $14 each. So I decided to make these and save myself some cash. For a total of $9 each I made these bulletin boards that are 3 times bigger and in custom colors! That’s a savings of $15! Here’s how I did it.
You will need foam craft board, (I doubled mine up so I can use thumbtacks in them.) Dense foam sheets, (I needed 2 to cover my board.) Colored duct tape, Fabri-tac glue, a staple gun and scissors.
My boards came in a two pack covered in plastic sheeting to hold them together. I left the plastic sheeting on and glued my colored foam directly to the boards.
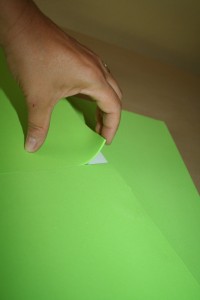
Glue foam sheet directly to craft foam boards
Cover the edges of the board with your colored duct tape. I put a strip of the colored duct tape down the center of the board to conceal the seam between the two foam sheets. I like the idea of two sections of the board so the kids have one half for school and the other half for home.
I glued the foam can holder onto the board on the duct tape in the center and then used the staple gun to really secure the cup holder to the board because I know this section will really get used taking pencils/pens in and out of it.
That’s it….now each child has his/her own work space and I did the whole area for under $30! Yay!

